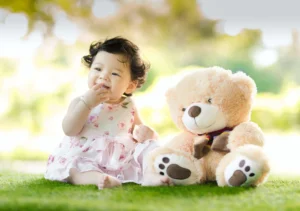
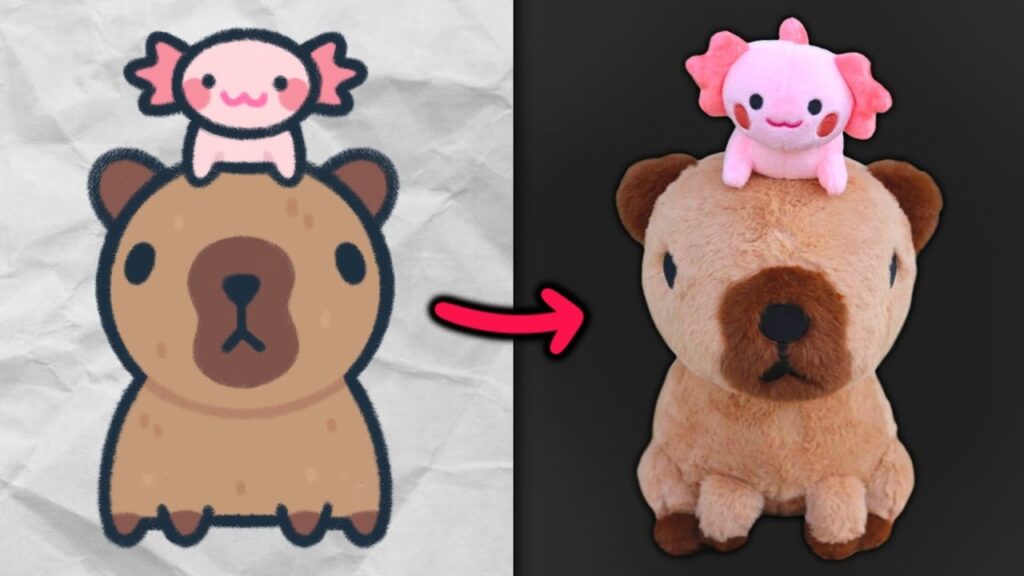
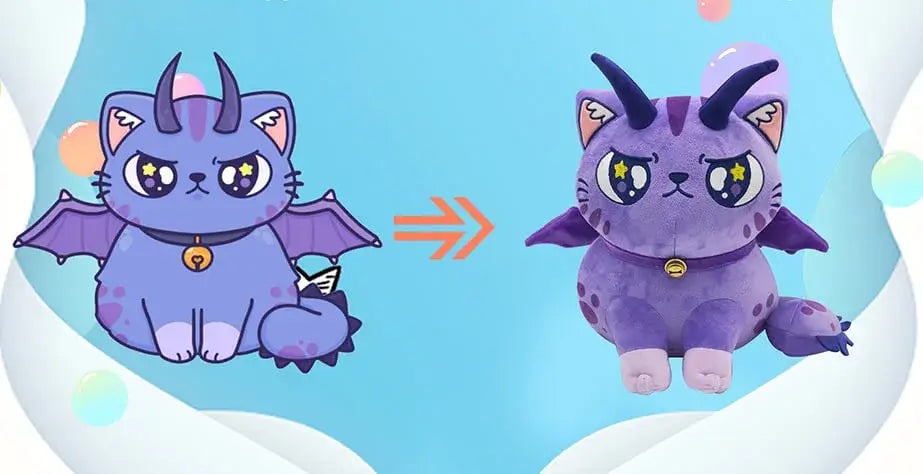
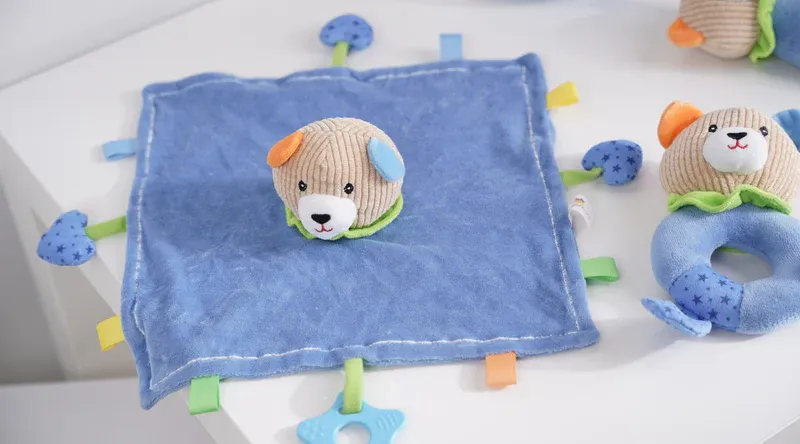
Turning a picture into a stuffed animal is an exciting blend of art and manufacturing. This process transforms flat images into soft, huggable toys that capture every unique detail of the original.
Creating a custom stuffed animal from a picture involves several careful steps: analyzing the photo, designing accurate patterns, selecting suitable materials, crafting prototypes, and finalizing production. Skilled designers and manufacturers work closely with clients to ensure the plush accurately reflects the photo’s features while meeting safety and quality standards.
Let’s explore how a simple image evolves into a lovable stuffed animal through expert craftsmanship.
1. What Is The Step-By-Step Process For Transforming A Picture Into A Stuffed Animal?
Turning a photo into a plush toy requires a clear, detailed process.
- Collect and study high-quality photos from multiple angles.
- Develop a 3D design concept based on the images.
- Create precise sewing patterns reflecting the shape and features.
- Choose fabrics and stuffing that match the animal’s texture and softness.
- Produce prototypes for client review and adjustments.
- Finalize the design and begin mass production after approval.
This stepwise approach ensures accuracy and customer satisfaction.
Transforming a picture into a stuffed animal follows a structured process involving photo analysis, design, prototyping, and production approval.
Each step is critical to preserving the pet’s unique characteristics.
Photo quality affects design accuracy; clear, detailed images reduce guesswork.
3D design translates 2D images into a moldable shape, considering proportions and posture.
Patterns must consider fabric stretch and seam placement for a realistic form.
Material selection balances look, feel, and safety.
Prototypes serve as physical samples for testing look, feel, and function.
Client feedback guides revisions before mass production starts.
This process ensures plush toys feel personal and authentic.
| Step | Description | Purpose |
|---|---|---|
| Photo Collection | Gather multiple angles | Accurate feature capture |
| 3D Design | Model transformation | Shape and proportion planning |
| Pattern Making | Draft fabric templates | Precise cutting and assembly |
| Material Selection | Choose fabric and stuffing | Texture and safety |
| Prototyping | Create initial sample | Review and adjustment |
| Production Approval | Client sign-off | Finalize for mass production |
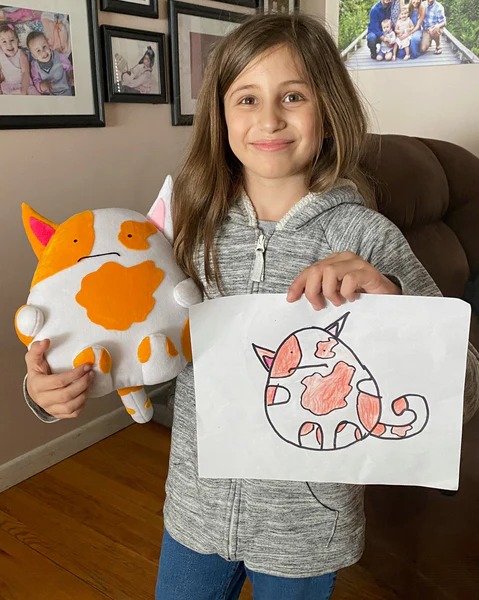
2. How Do Designers Capture Unique Features From Photos To Create Accurate Plush Models?
Capturing the pet’s unique traits is key to a beloved plush.
- Focus on distinctive markings, colors, and facial expressions.
- Use software to convert photos into detailed 3D renderings.
- Pay attention to size proportions, posture, and fur patterns.
- Collaborate with clients to verify accuracy and suggest tweaks.
Detail-oriented design makes each stuffed animal special.
Designers use detailed analysis and 3D modeling to capture unique pet features from photos for realistic plush toys.
Technology aids designers in extracting details from images.
3D software helps visualize the pet’s volume and shape.
Color matching ensures fabric choices replicate real fur tones.
Facial features require special attention for expression and personality.
Client communication is vital to ensure no detail is overlooked.
Designers balance realism with manufacturing feasibility.
Unique features can include scars, patches, or specific postures.
This level of detail strengthens emotional connections.
| Feature Aspect | Method | Importance |
|---|---|---|
| Markings | Color analysis and matching | Realistic appearance |
| Facial Expression | 3D modeling and embroidery | Personality capture |
| Size and Posture | Precise measurements | Accurate scale |
| Client Collaboration | Feedback and revisions | Customer satisfaction |
3. What Materials And Techniques Are Best For Realistic Custom Plush Animals?
Material choice and manufacturing methods affect realism and durability.
- Use high-quality faux fur, velvet, or minky fabrics to mimic fur texture.
- Employ fine embroidery or applique for facial details.
- Use hypoallergenic stuffing for softness and safety.
- Incorporate jointed limbs or weighted fills for lifelike movement.
- Apply advanced sewing and finishing techniques for durability.
These choices combine comfort, aesthetics, and safety.
Selecting premium fabrics and skilled techniques ensures custom plush animals look and feel lifelike and durable.
Fabric texture defines the tactile experience.
Minky fabric is ultra-soft, ideal for baby-safe plushies.
Faux fur offers a realistic coat but may require special care.
Embroidery secures facial details while ensuring safety.
Weighted stuffing mimics natural animal weight and posture.
Jointed limbs add playability and poseability.
Durable stitching withstands regular handling.
Material and technique balance quality, cost, and safety standards.
| Material | Feature | Benefit |
|---|---|---|
| Faux Fur | Realistic texture | Visual and tactile realism |
| Minky Fabric | Soft and hypoallergenic | Child safety |
| Embroidery | Secure facial features | Safe and detailed |
| Weighted Filling | Adds natural weight | Realistic feel |
| Jointed Limbs | Mobility | Interactive play |
4. How Are Prototypes Developed And Approved In The Custom Plush Production Process?
Prototyping turns designs into tangible samples.
- Initial prototype crafted using selected materials and patterns.
- Reviewed internally for craftsmanship and accuracy.
- Shared with client for feedback on look and feel.
- Adjustments made to meet client expectations and production feasibility.
- Final prototype approved to proceed to mass manufacturing.
This phase prevents costly errors and ensures satisfaction.
Prototypes are physical samples reviewed and revised collaboratively to finalize custom plush designs before production.
Prototyping bridges design and manufacturing.
The first sample reveals fit and finish issues unseen in digital models.
Clients evaluate details like color, softness, and pose.
Adjustments may include pattern tweaks or material swaps.
Multiple prototype rounds may be needed for perfection.
Clear timelines and communication streamline approval.
Prototype costs are an investment in quality control.
Thorough prototyping reduces returns and boosts brand reputation.
| Prototype Stage | Activity | Outcome |
|---|---|---|
| Sample Crafting | First physical plush creation | Visual and tactile review |
| Internal Review | Quality and accuracy check | Identify production issues |
| Client Feedback | Receive comments and requests | Align with customer vision |
| Revisions | Adjust design or materials | Improved prototype |
| Final Approval | Client sign-off | Ready for mass production |
5. What Are The Challenges And Limitations In Creating Stuffed Animals From Pictures?
Creating plush from photos has unique obstacles.
- Photos may lack necessary angles or detail for full 3D understanding.
- Material colors might not perfectly match natural fur.
- Complex poses or small details can be difficult to replicate.
- Production costs may increase with customization complexity.
- Time constraints can limit prototype revisions.
Understanding challenges helps manage expectations.
Limitations in photo detail, color matching, and complexity can challenge accuracy and cost in custom plush creation.
Limited photos can force designers to make assumptions.
Color in photos can differ from reality due to lighting.
Certain fur textures are hard to imitate with available fabrics.
Intricate features increase manual labor and costs.
Clients must balance customization desires with budget and timeline.
Effective communication mitigates surprises.
Educating clients on feasible limits improves satisfaction.
Continuous innovation aims to overcome these barriers.
| Challenge | Cause | Impact |
|---|---|---|
| Limited Photo Detail | Incomplete images | Reduced accuracy |
| Color Mismatch | Lighting variations | Design revisions |
| Complex Features | Small or intricate details | Increased cost and time |
| Cost Constraints | High customization | Budget limitations |
| Time Limitations | Prototype cycles | Shorter development time |
6. How Can Clients Collaborate Effectively With Manufacturers For Custom Plush Orders?
Strong collaboration ensures smooth custom plush projects.
- Provide clear, high-quality photos and design references.
- Communicate expectations and deadlines upfront.
- Request prototypes and offer detailed feedback.
- Discuss material options and safety requirements openly.
- Establish regular updates and transparent timelines.
Good partnerships result in plush toys that exceed expectations.
Clear communication, timely feedback, and mutual understanding foster successful custom plush collaborations.
Sharing detailed images and notes prevents design errors.
Setting realistic deadlines avoids rushed production.
Early prototype feedback reduces costly revisions later.
Discussing safety certifications ensures market compliance.
Regular updates keep clients informed and confident.
Trust builds smoother workflows and repeat business.
Collaborations often lead to innovative, unique products.
Strong partnerships benefit all stakeholders.
| Collaboration Step | Best Practice | Benefit |
|---|---|---|
| Detailed Inputs | Provide clear photos/designs | Accurate design |
| Open Communication | Discuss needs and timelines | Manage expectations |
| Prototype Feedback | Give detailed reviews | Refined final product |
| Safety Discussions | Address certifications early | Market compliance |
| Regular Updates | Schedule progress reports | Transparency and trust |
Turning pictures into stuffed animals combines art and precision, creating unique plush toys that capture cherished memories.
For personalized assistance, contact Amanda at [[email protected]] or visit [https://plushtoyinchina.com].